Brackets & Mounts
MK3S Y-Axis Motor Mount Ultra
SKU 3DPW-pr-57937
$16.00NZD
In stock · Made-to-order resin · Ships from Auckland · Free shipping over $75
- Material
- High-Detail Resin (8K)
- Colour
- Grey
- Weight
- ~40 g
- Print time
- ~4.5 h
- Shipping
- $10 std · $20 express
- Lead time
- 1-3 d print + 1-4 d ship
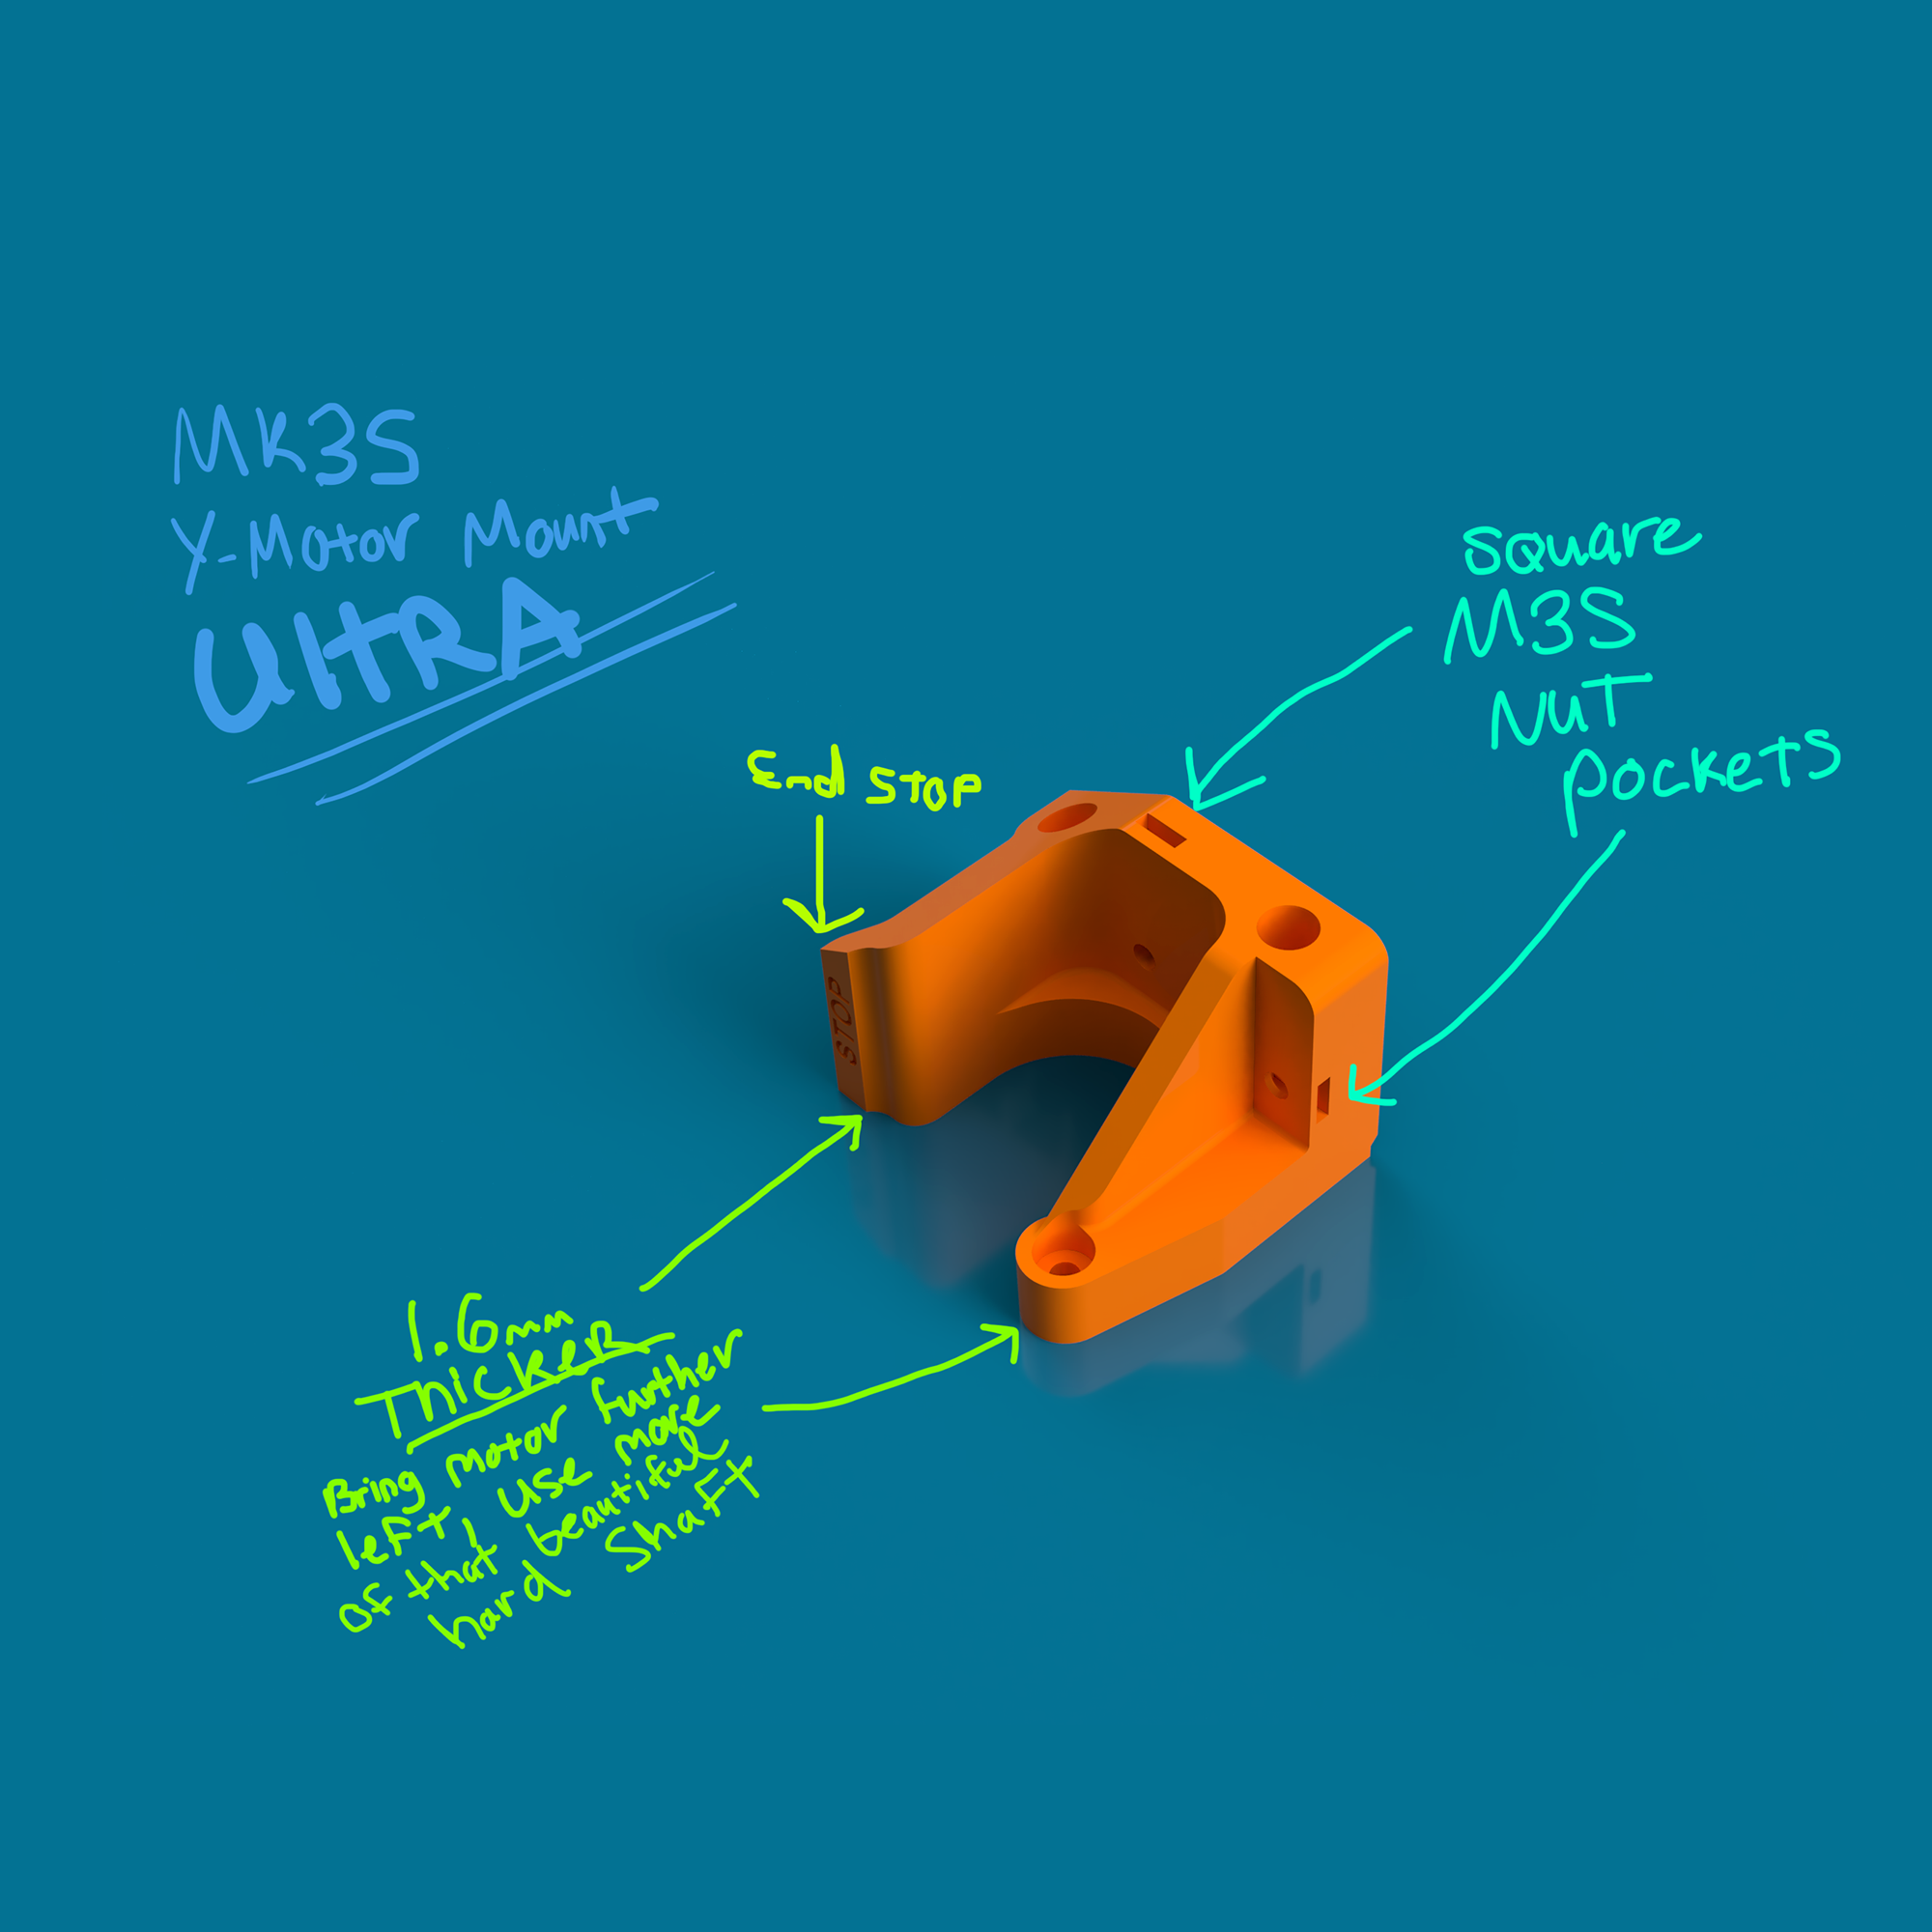
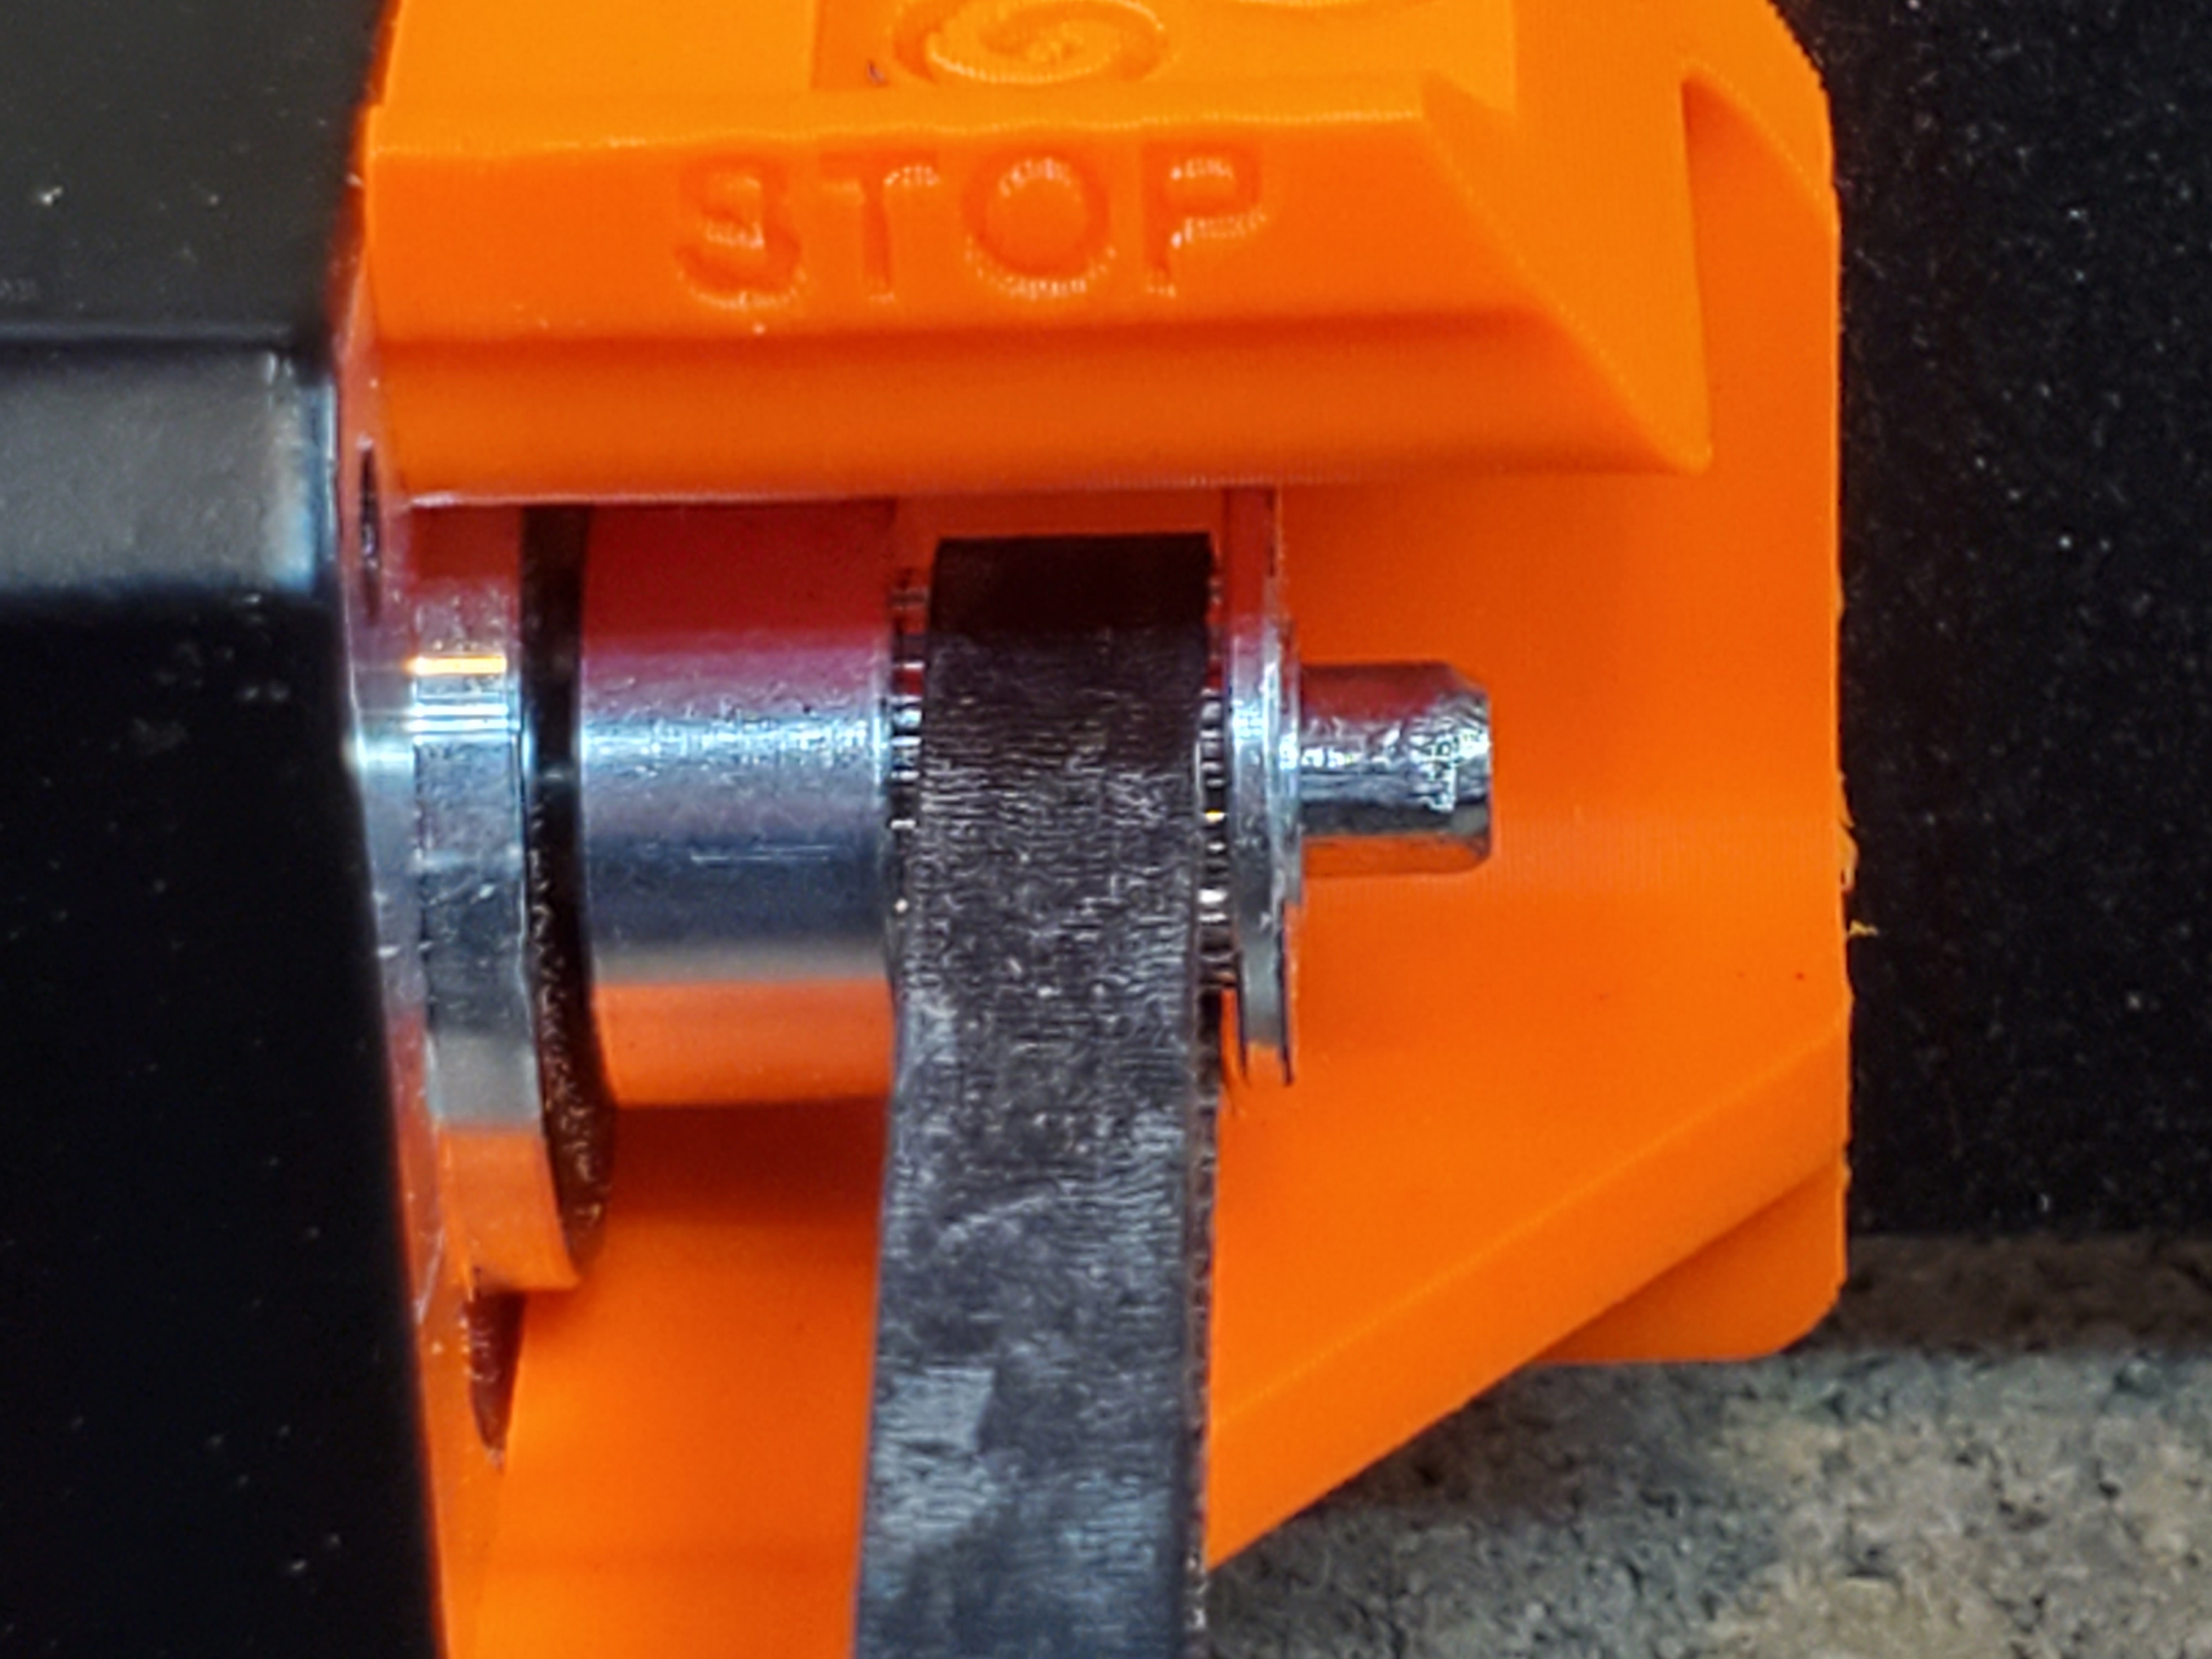
I remixed xander1's remixed design of the beefier Y-Motor Mount to make a few changes: (all credit goes to xander1 and teookie for their original sturdier design that incorporates the end-stop) Increased width of the motor mount by 1.6mm to bring the motor more to the left; this allows you to slide the pulley on the motor shaft further to the right and use more of that beautiful shaft. This will also help with belt alignment. His design had an optional shim you can print to achieve this; however I felt it best to just incorporate this into the full design without the need to print the optional shim, and I also increased the spacing amount from 1mm to 1.6mm. I settled on 1.6mm because that is slightly less than the maximum amount you can move the motor to the left if you have a heatsink attached to the Y-Motor. So no matter your setup, this amount should work great!Now you can use square M3S Nuts instead of the M3 Lock Nuts. I really hate those things and they always rotate and strip away the plastic or fall off. I also had one strip out and couldn't get my old stock motor mount off the frame!Like his design, this retains the improved end-stop that is compatible with the MK3S(+) and prevents your bearings from slamming into the frame of the printer.Nuts and Bolts Needed: 2x M3S Square Nuts2x M3x10 Bolts2x M3x25 Bolts (or an M3x20 and M3x30).1x M3x14 Bolt (or M3x16, M3x18).Print Settings: Print with 0.20mm layer height, minimum of 4 perimeters (do 5 perimeters for extra strength), and 20% gyroid infill. Clean up any elephant foot after the print with a razor to make sure the back surface that goes up against the frame is completely flat. Assembly: The assembly is pretty straight-forward. Mount the motor like you would with the Prusa instructions. Use a M3x10 bolt in the shorter (top) frame mounting hole.Use a M3x14 bolt in the longer (bottom) frame mounting hole. If you don't have a 14mm bolt, you can also safely use a longer bolt here as long as it doesn't stick out and hit the pulley/belt.Use the other two M3x25 bolts and the final M3x10 bolt to attach the motor to the mount. If you do not have 25mm bolts, you can download and slice the “PrusaBoltsEdition” STL which uses 20mm and 30mm bolts in these spots, and those are included in the Prusa spare parts kit.The nut pockets are designed to be tight to prevent the M3S nuts from falling out. Use the smallest hex key included in your Prusa kit to shove them into the pockets, all the way. With the M3S square nuts, the mount tightens down nicely to the frame without having to mess with the M3 lock nuts ever again! Remixing: I added the .step file. Feel free to remix this design even further and make any improvements you would like! UPDATES: 2/23/21 I changed the instructions to say a M3x14 bolt instead of a M3x12 bolt. The M3x12 was just slightly too short. I also added a photo of my mount in action, showing that the belt is now perfectly center on the pulley! I could never get it center before with the stock MK3S mount! This Y-Axis motor mount is just working completely flawlessly!Added a “PrusaBoltsEdition" STL so you can use 20mm and 30mm bolts from the Prusa kit if you do not have 25mm bolts. You will have to slice it yourself. _________________________________________________________________________________ I like to modify my printer parts, trying to make them better. Take a look at some of my other projects and designs: MK3S Y-Axis Motor Mount Ultra (improved Y-Axis motor mount with better shaft and nuts) MK3S Z-Axis Tops Improved (Less vibration and easier Z-Screw Alignment) D.R.O.P.P.E.R. - PINDA Adjustment & Positioning Tool (Achieve the perfect SUPERPINDA position) MMU2S Single Filament Guide Festo M5 Coupler (Retain your original MK3S spool mounting while still using MMU2S in single color mode) Nozzle Holder Case Ultra (Biggest and bestest way to store your extra nozzles). Ultimate Fan Speed Test (Determine your best fan speed dynamically) … And more! Check out my profile for a full list of my designs. _________________________________________________________________________________ If you found this design useful and want to support me in my 3D printing and photography endeavors, check out my Patreon: https://www.patreon.com/photogad or if you'd prefer to make a one time donation via PayPal, use the donate link next to my name at the top of this page. I'd appreciate it! 😀
Tags: upgrade, prusa, mk3, motor, mount, part, resin print, nz made, made to order
Design credit: Original design by OurAngryBadger - licensed under CC-BY.
View original model + STL files on Printables ↗
View original model + STL files on Printables ↗
Frequently asked
How long does shipping take?
MK3S Y-Axis Motor Mount Ultra is printed to order. Lead time is typically 1-3 business days plus 1-4 days NZ shipping. Standard NZ shipping is $10, free over $75.
What material is this printed in?
By default this is printed in High-Detail Resin (8K) at 0.025 mm layer height on an MSLA resin printer. Custom material and colour swaps are available, just leave a note at checkout.
Can I get this in a different colour?
Yes. Every product can be printed in any of the resin colours we stock, or hand-painted on request. Leave a note at checkout or email [email protected].
Do you ship outside of New Zealand?
Currently New Zealand only. Australian shipping is coming.
Who designed this?
Designed by an independent sculptor and licensed for commercial printing. The original is linked on this page.