
Neptune 4 Plus Bed (Y Axis) Rail Spacing Jig
- Arrives in 2 to 7 business days Printed in Auckland. $10 shipping, free over $75
- 14-day faulty refund If it arrives broken or misprinted, we reprint or refund it
- Secure checkout Card payments handled by Stripe
- Material
- High-Detail Resin (8K)
- Colour
- Grey
- Weight
- ~36 g
- Print time
- ~2 h
- Express shipping
- $20
More information
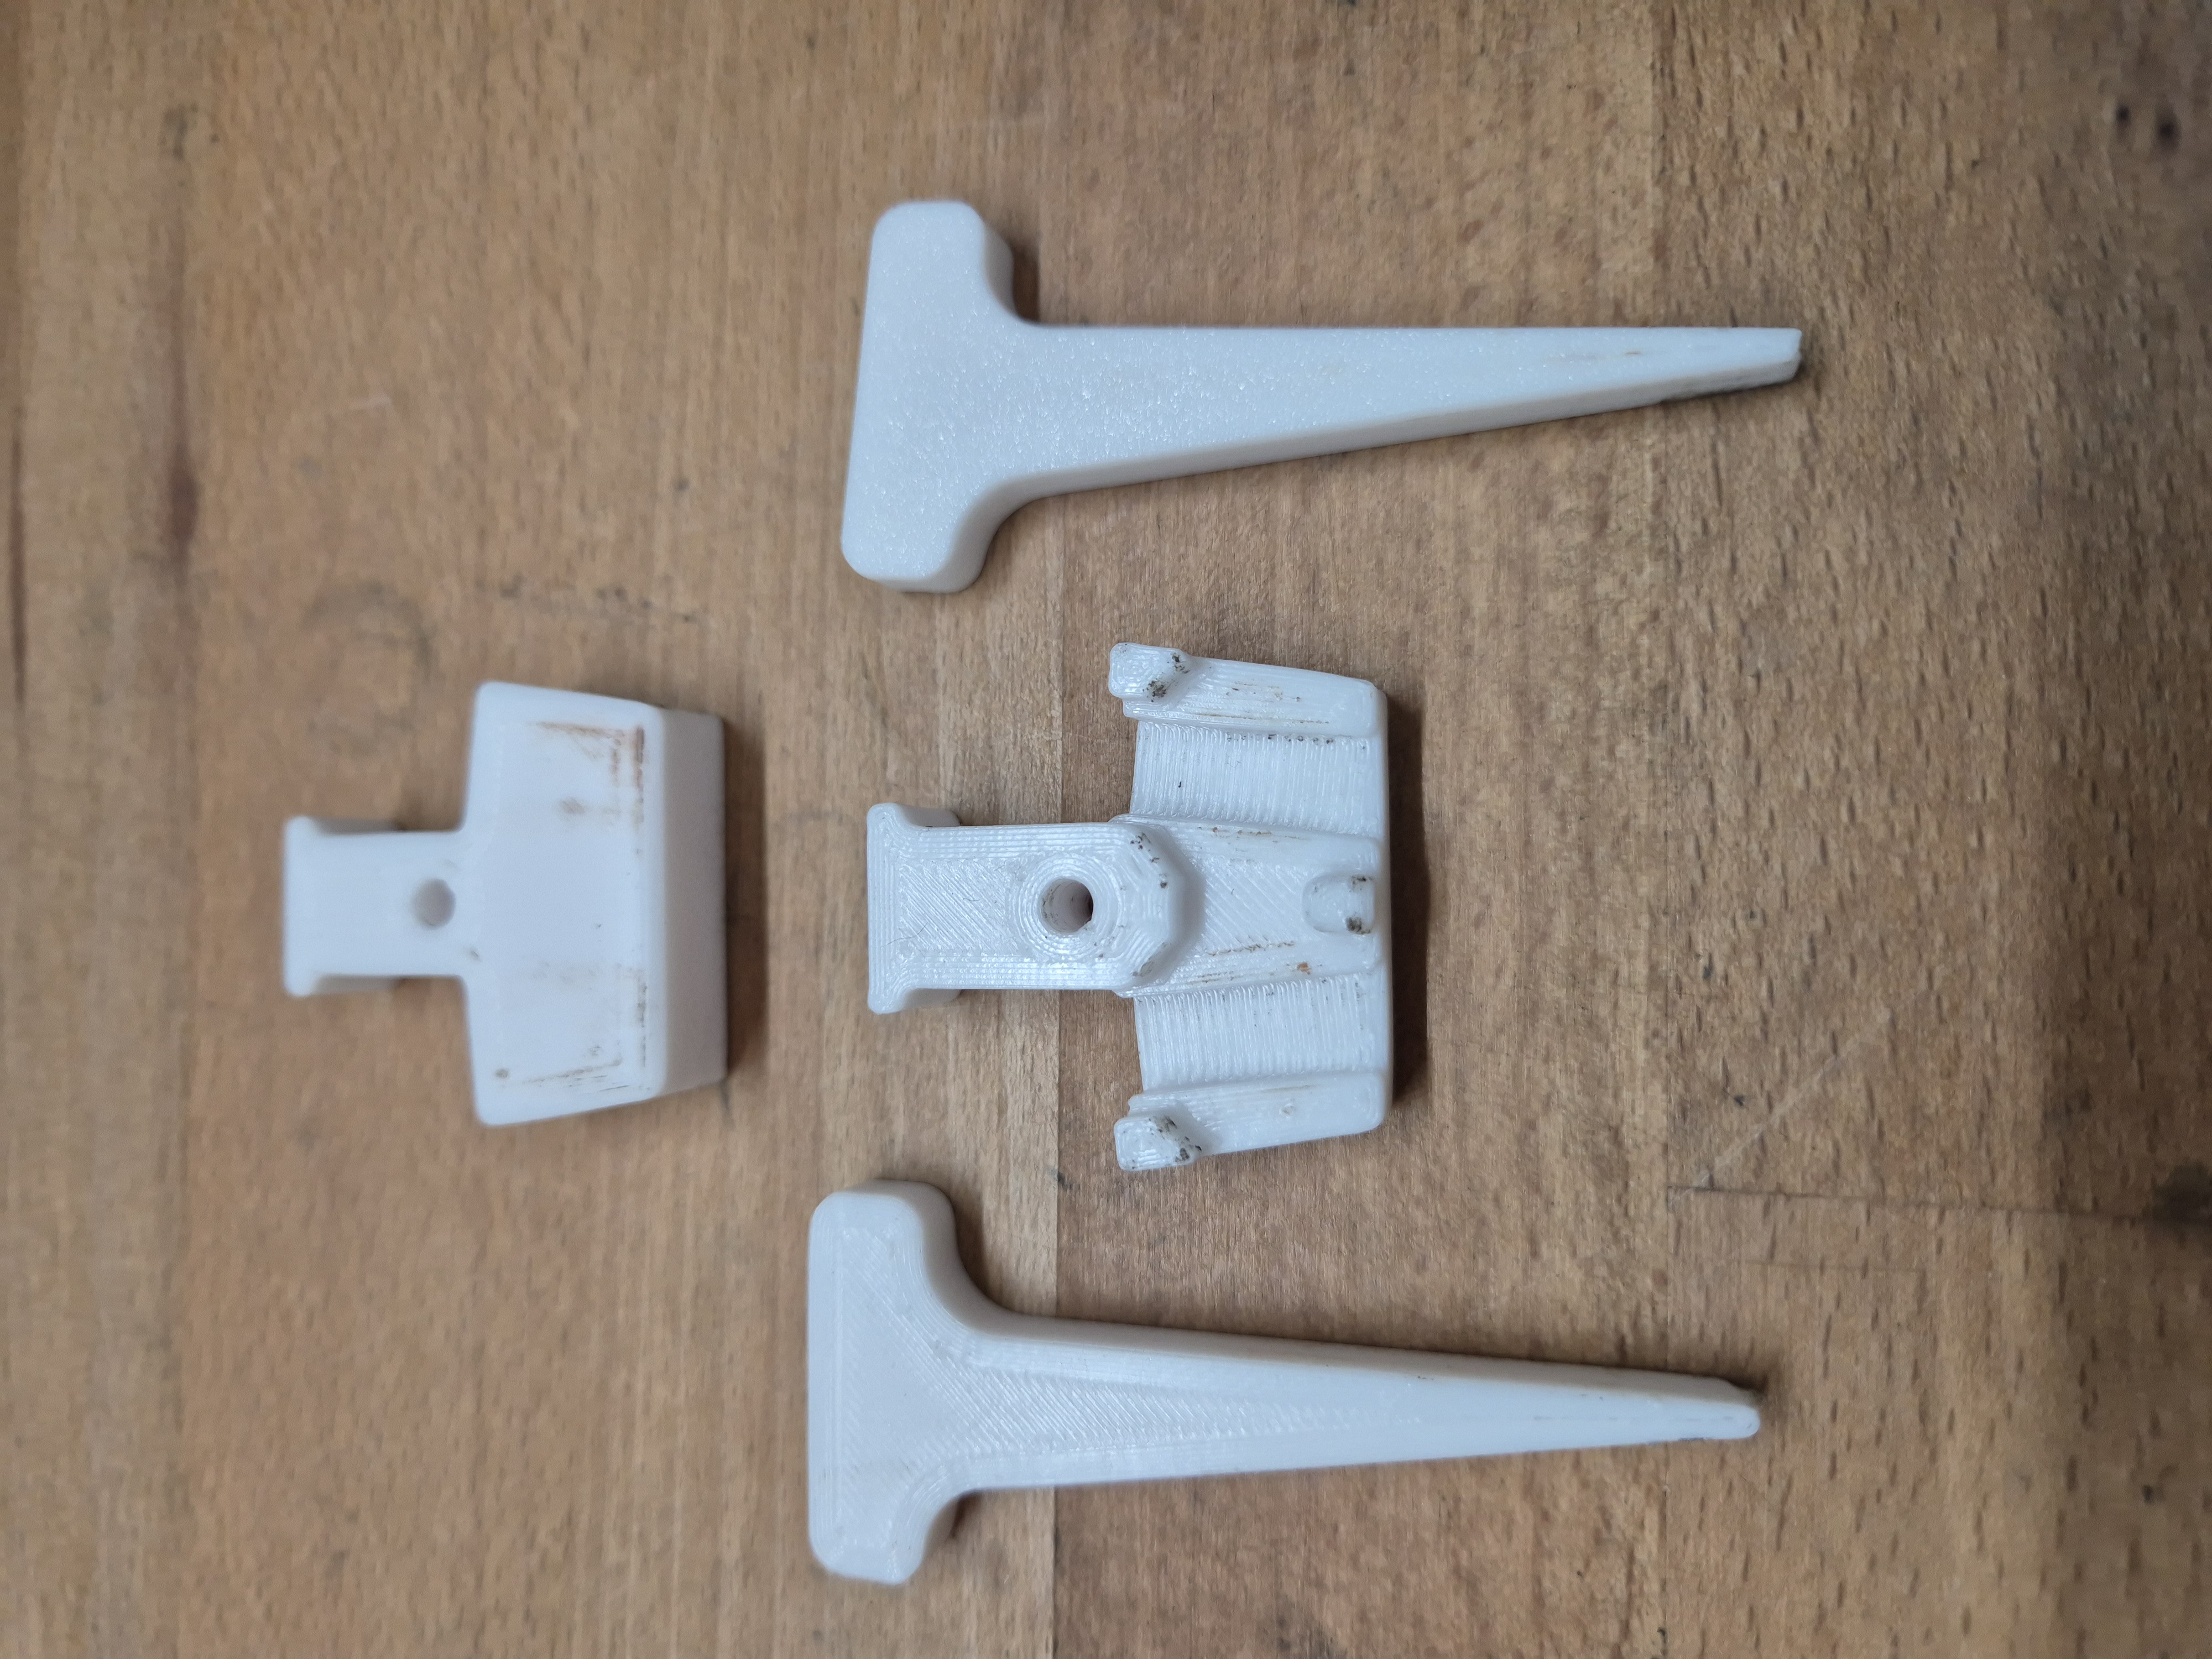
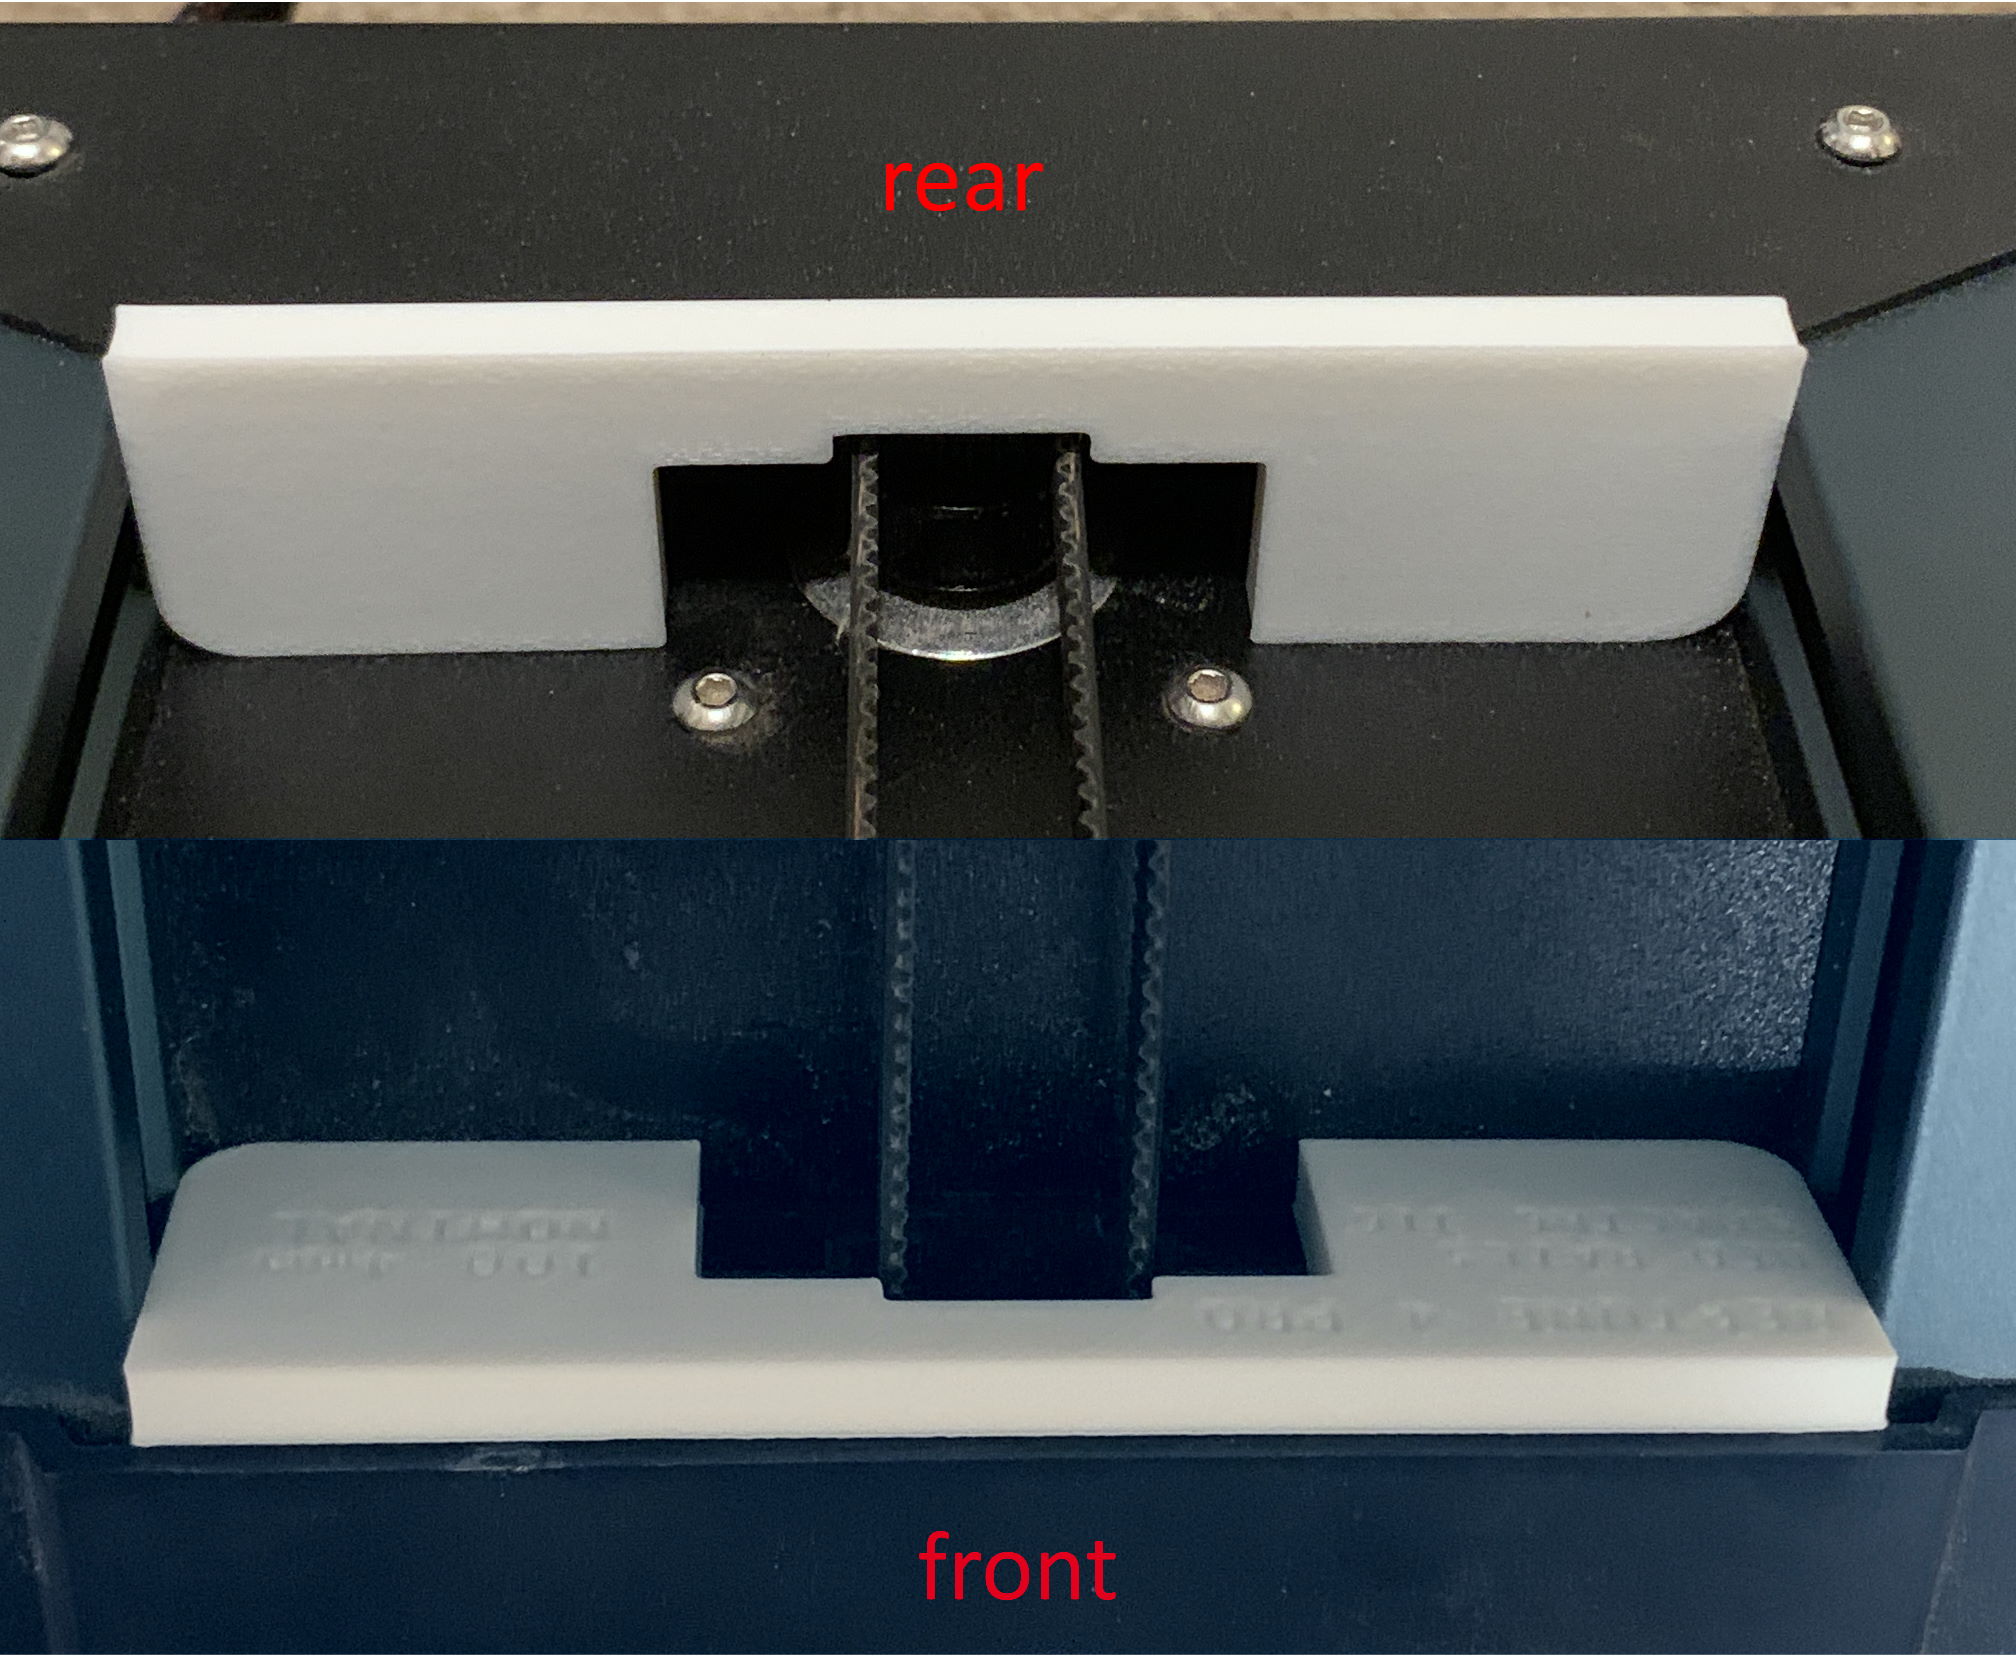
On some Neptune 4 Pros I've been fixing I've found that no matter what adjustment I make, the bed POM wheels (and thus the bed) are very loose. I've found that the rails have been pulled inward and need spaced out. At first I made a laser cut plastic jig to space the rails but figured I'd make a printable jig that's more accessible to others fixing 3D printers with 3D printers.
I don't have a Neptune 3 Pro so I don't know if these will work on that model.
I recently got a Neptune 4 Max and this adapter won't work as-is. Once I get to checking the rails on mine, I'll upload a Max version.
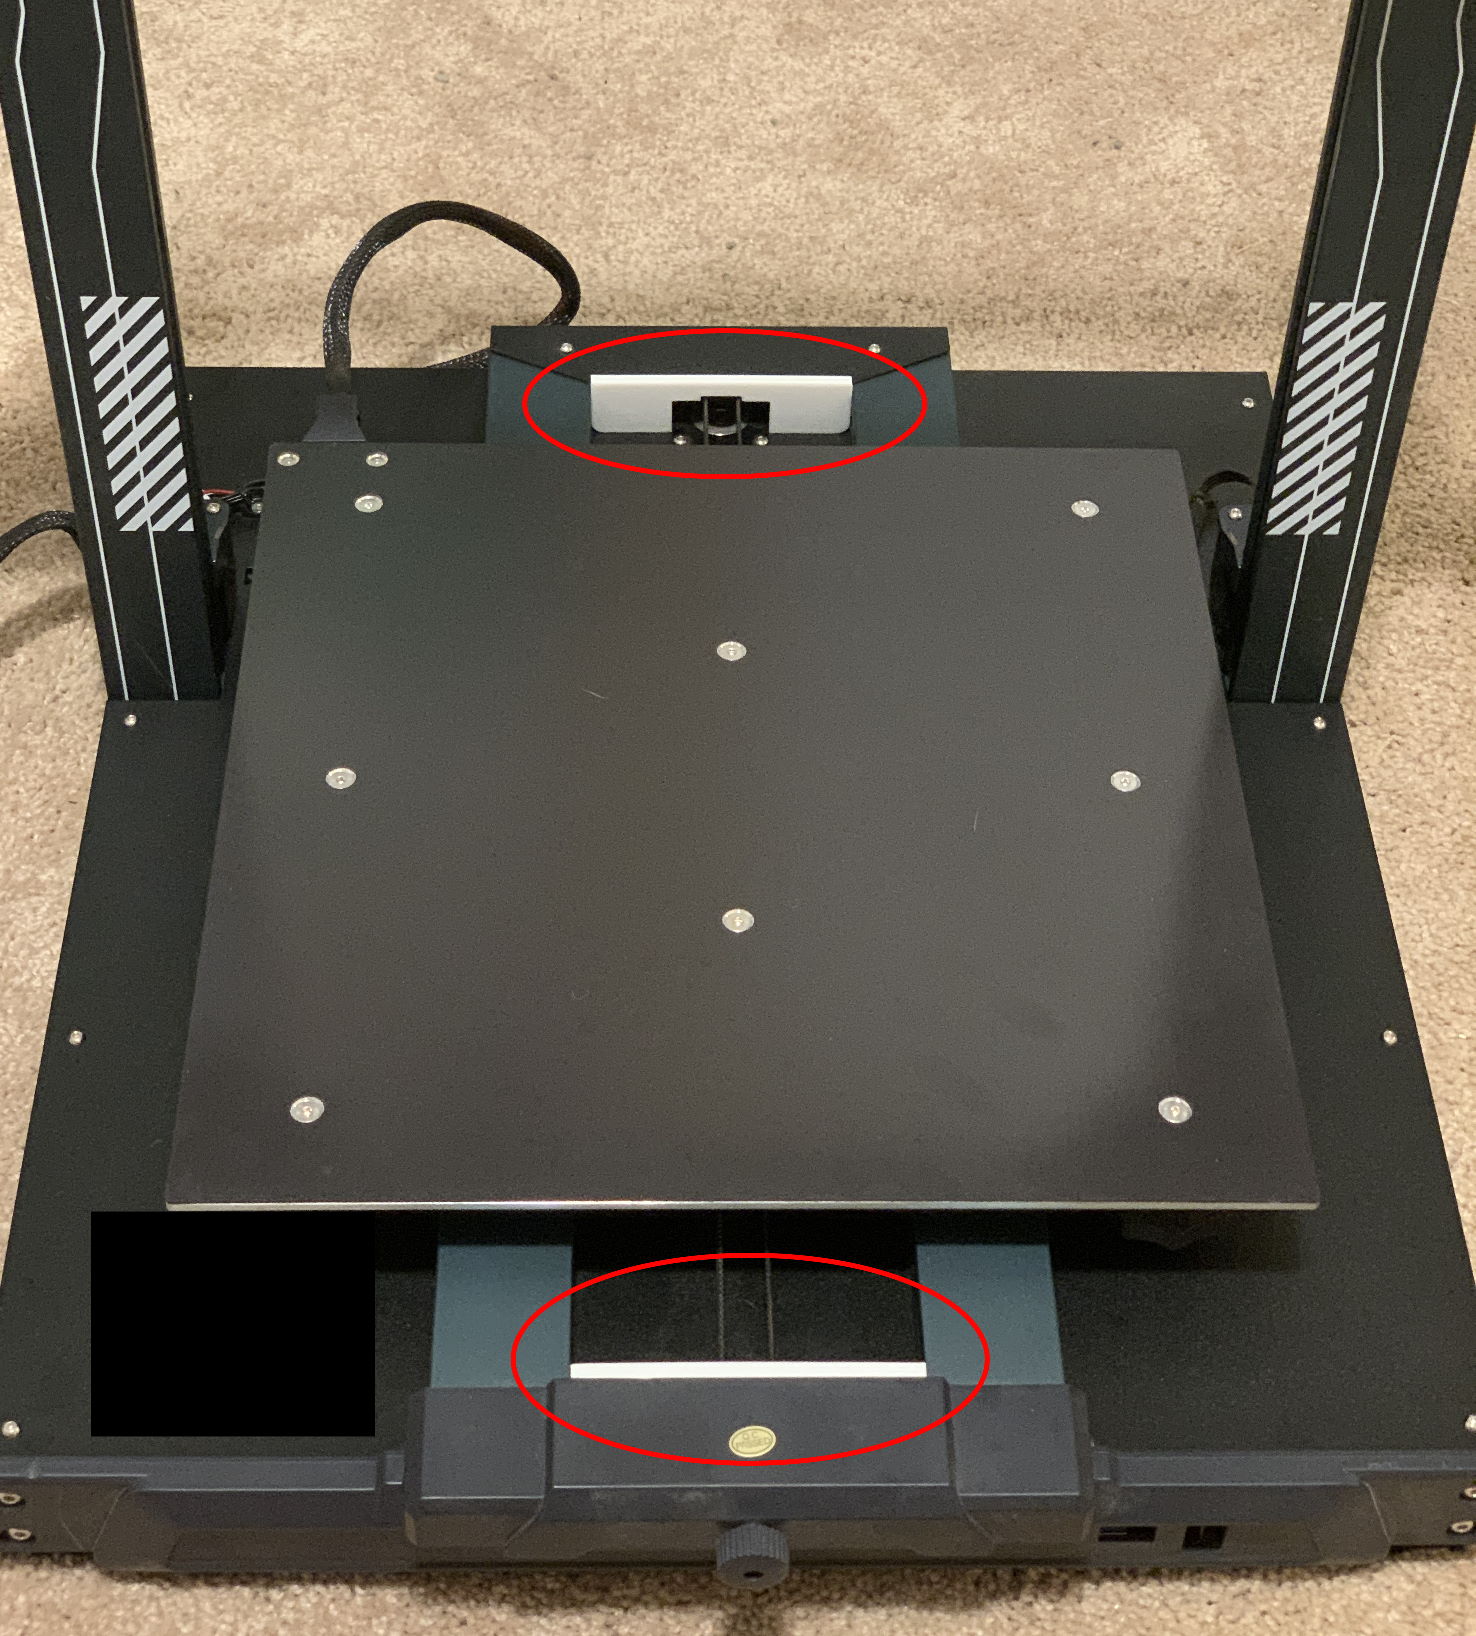
You will need two of these jigs to space the rails.
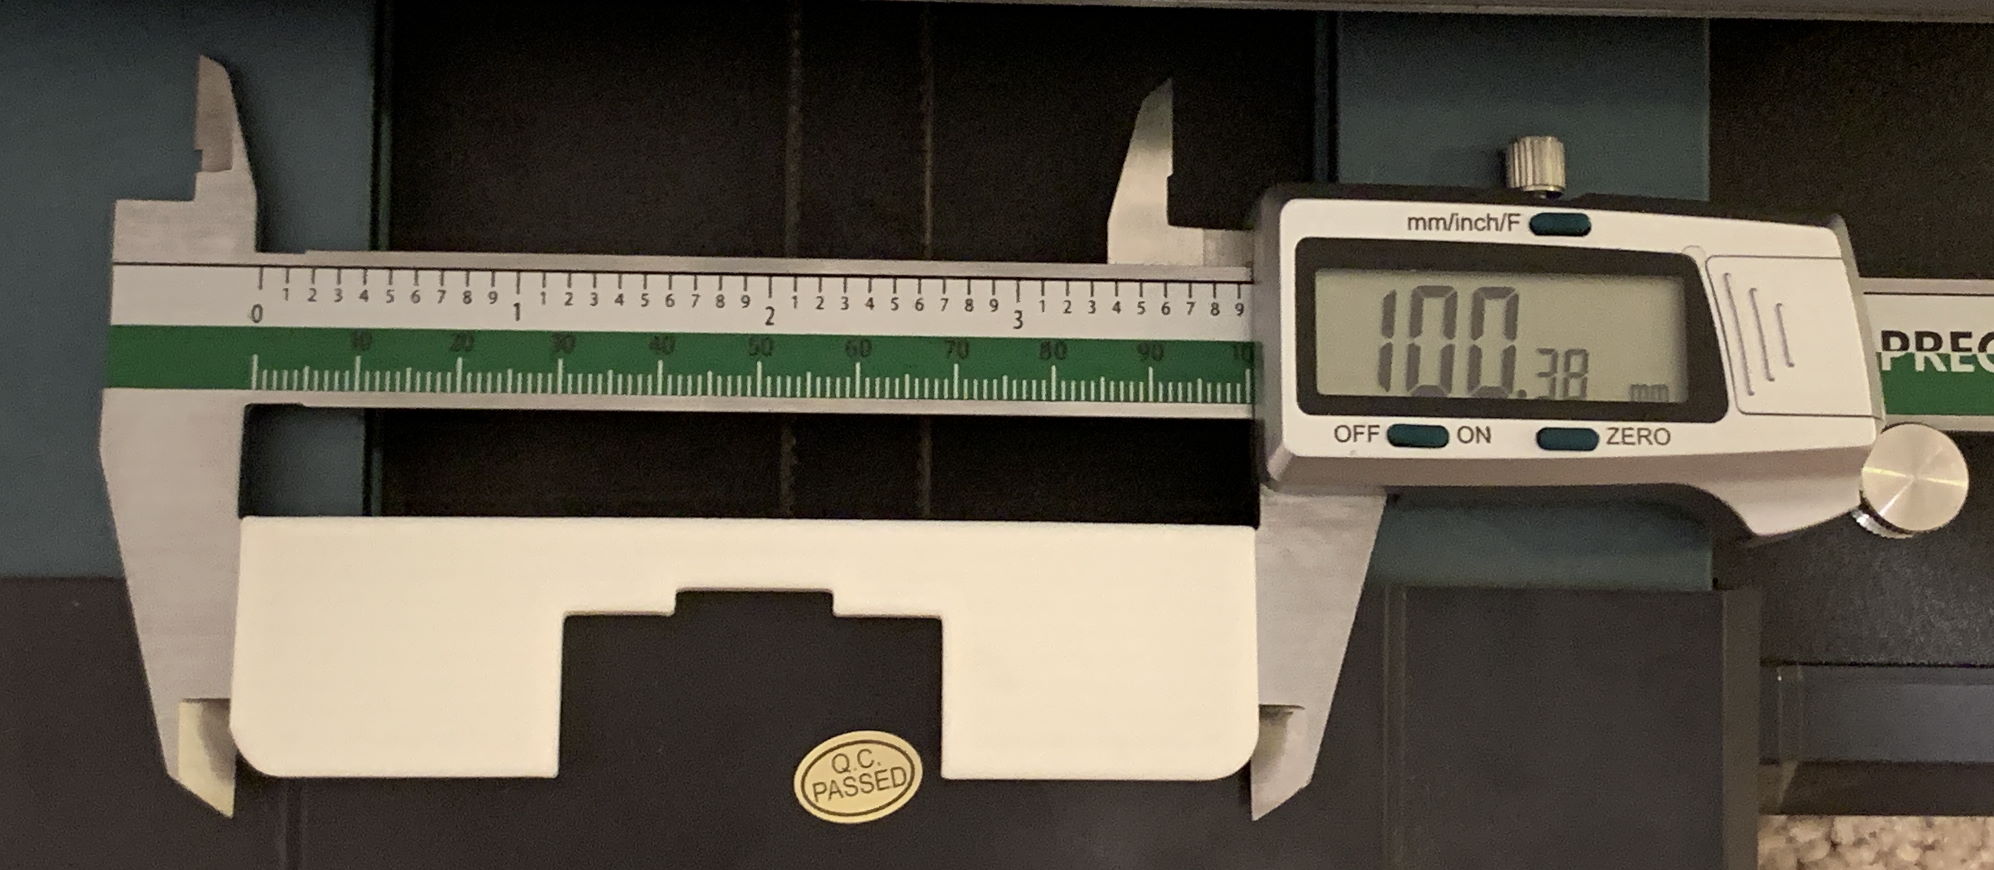
Scale appropriately for shrinkage and accuracy of your printer. Measure after printing for accuracy, and reprint after rescaling if the jig is too small or add masking tape to the jig to enlarge. The model itself is exactly 100.4mm wide. If in doubt, scale and print the jigs slightly too large and sand the spacer to final size.
From my experimentation, I've found that the jig should measure between 100.3 to 100.5mm wide. This gives plenty of adjustment room for the wheels without causing them make contact in the loosest position.
Or you could of course upgrade to a linear rail setup if you don't want to deal with POM wheels :)
Edit 20240612:
Added a centering jig to measure an offset of 130mm from the edge of the machine to the side of the rail. Print as oriented and scale to make sure the total printed length measures 140mm. The flat face of the fat part can rest against the side of the machine, and the 130mm long segment should touch the rail on one side. If using this method, center using only one side of the machine. It doesn't matter if the bed is centered within the printer, only that it isn't skewed.
How to space and center the rails:
• You will need allen keys (the ones that come with the printer work), a wrench for the eccentric nuts (the one that comes with the printer will work) and a caliper with at least 0.01mm indicated precision. • Set the left bed eccentric nut to roughly center, and set the 3 right eccentric nuts to fully loose. • Remove the cover plate from the bottom of the printer. There are two bolt lengths so keep track of what size goes where. • Loosen the 4 small and 2 large bolts that bolt to the rails from under the printer. One screw is under the mainboard PCB so you'll need to remove those 4 screws to access it. The two larger screws are part of the Y tensioner bracket. Screws do not need to be removed, only loosened. • With the printer upright, loosen the rear metal bracket screws. There are two screws on top, and two at the rear. • Loosen the 8 bolts tightening the rails to the printer frame. • Insert the jigs between the rails, one at the very front and one at the very rear. The cutout in the jig should clear the Y belt and any stepper motor hardware. • Begin to center the rails. • First method: Using calipers, measure perpendicularly from the side edge of the printer to the outside of the rails at each set (front and rear) of top rail bolts. The absolute measurements don't matter, but the set of front measurements should match and the set of rear measurements should match as close as possible. Ensure the rails are pushed tight against the jigs. Tighten one top bolt on each rail once you have the rails centered. • Second method: Use the 3D printed centering jig on one side of the machine. Make sure the jig measures as close to 140mm total length as possible. While pushing the jig both against the machine and lined up and pushed against the front bed rail bolts, push the loosened rails toward the jig, then tighten one bolt on each rail. Do this again for the rear set of bolts.
• Ensure again that the rails are pushed tight to the jig, and that all 4 corner measurements correlate to center or the jig is flat to both the rail and the side of the printer on one side only. Loosen and readjust until you are sure. • Fully tighten the top bolts of the rails. Check again that all measurements are good. If not, loosen the bolts and redo step 8. • Tighten the rear metal rail plate to the rails. Tighten the 6 underside rail bolts. Reinstall the mainboard into position and install 4 mainboard screws. • With the printer upright, if looking from the front, while lightly pulling the bed to the right, set the eccentric nuts of the POM wheels to make contact with the frame at the appropriate pressure. It should be just enough to barely grab the frame without slipping when turning by hand. Do this for all 3 wheels. The middle one is fiddly to get to. • Try moving the bed forward and back. There should be no binding or flat spots. The bed should not easily wobble clockwise or counterclockwise. If there are any issues, do step 12 again. • Set the left side eccentric nut to make contact as you did in step 12. Then repeat step 12 to 13. • Replace the bottom cover.
(The printed part photo shows “Neptune 4 Pro” on the part - this has been fixed in the uploaded model. Oops)
Design and description by true , licensed CC-BY.
Frequently asked
How long does shipping take?
Neptune 4 Plus Bed (Y Axis) Rail Spacing Jig is printed to order. Lead time is typically 1-3 business days plus 1-4 days NZ shipping. Standard NZ shipping is $10, free over $75.
What material is this printed in?
By default this is printed in High-Detail Resin (8K) at 0.025 mm layer height on an MSLA resin printer. Custom material and colour swaps are available, just leave a note at checkout.
Can I get this in a different colour?
Yes. Every product can be printed in any of the resin colours we stock, or hand-painted on request. Leave a note at checkout or email [email protected].
Do you ship outside of New Zealand?
Currently New Zealand only. Australian shipping is coming.
Who designed this?
Designed by an independent sculptor and licensed for commercial printing. The original is linked on this page.